The Riftbreaker update is now available to download on PC, Ps4, PS5, and Xbox one. According to the official The Riftbreaker patch notes, the latest update addresses some bugs and crashes.
Previously, a major update added new changes, fixes, and gameplay improvements.
Unfortunately, players are still experiencing several issues since the release. Today’s The Riftbreaker version will fix a few of these issues.
Check out more details below.
The Riftbreaker Patch Notes – November. 15, 2022
FEATURES
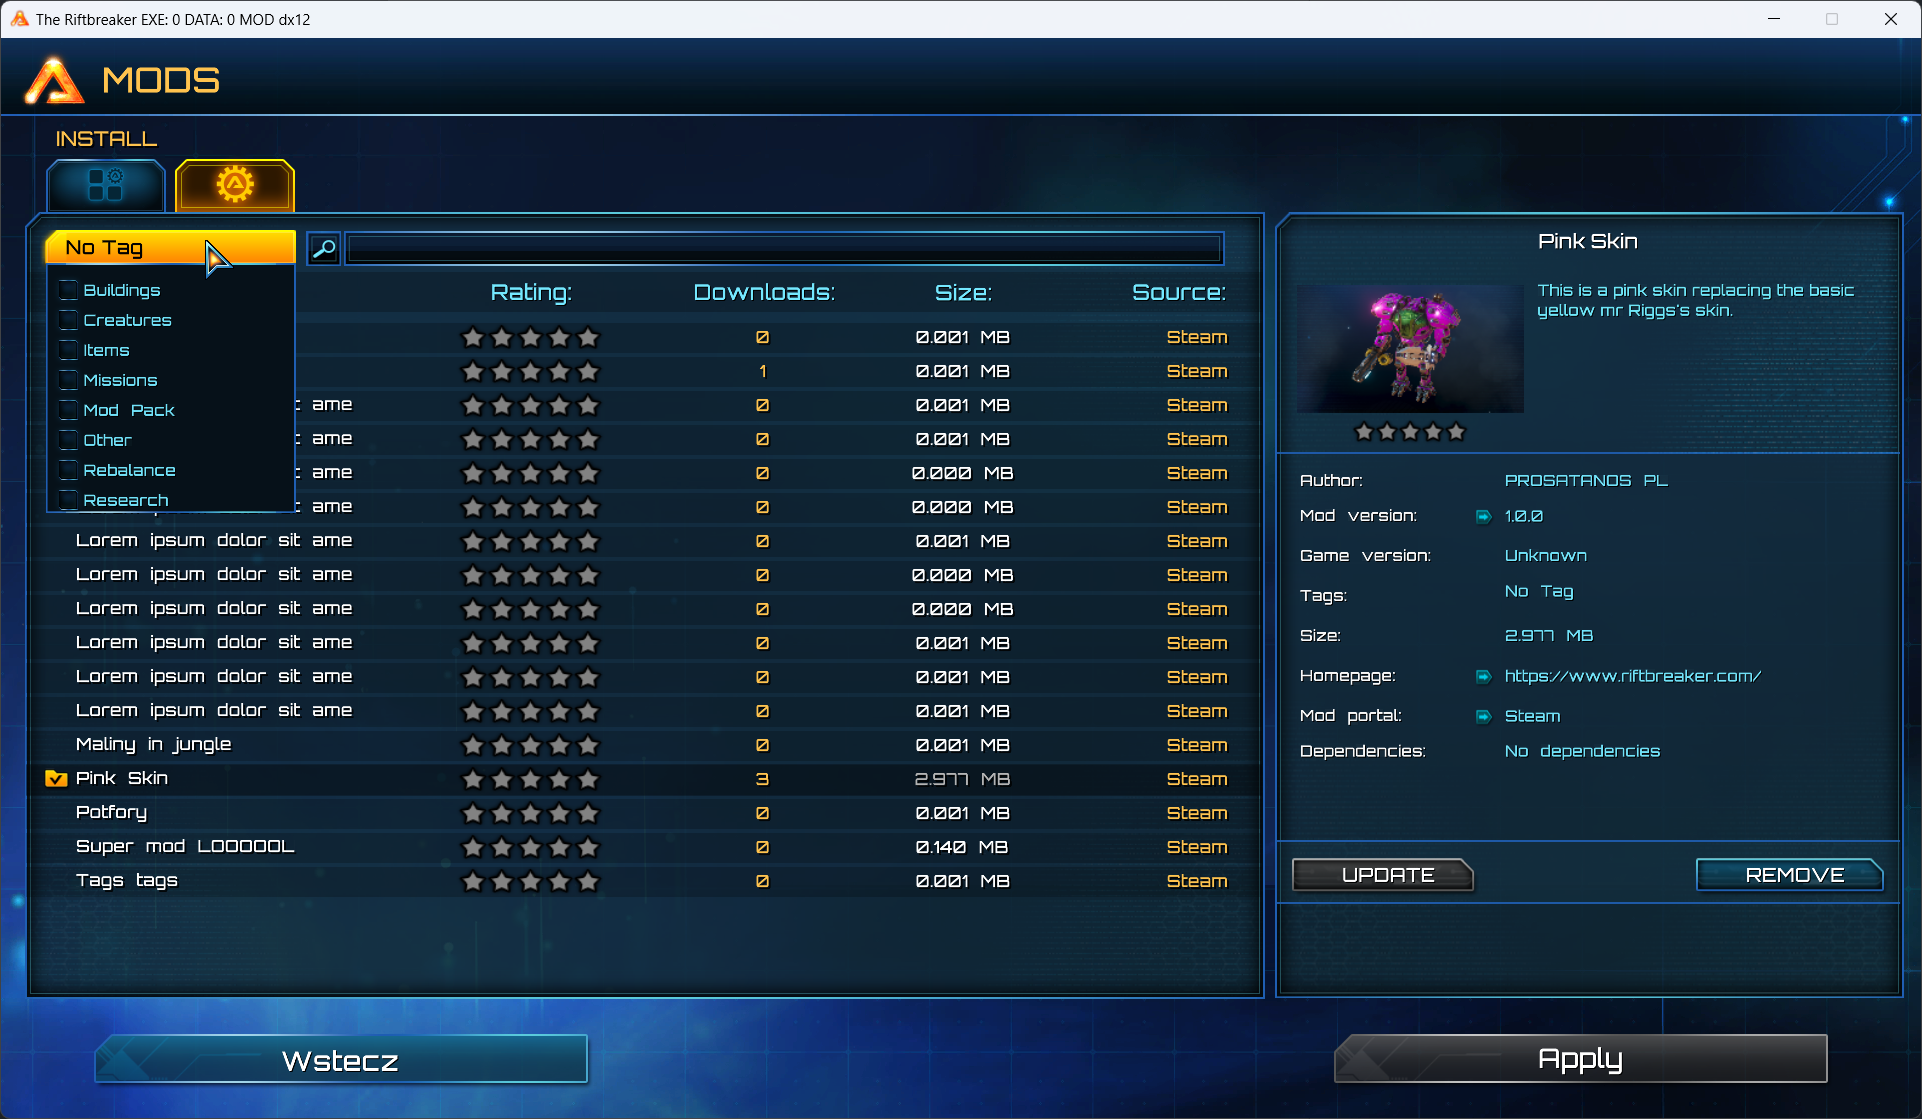
- Added an integrated modding manager. The new manager is a comprehensive built-in browser that allows users to download mods for The Riftbreaker with just a couple of clicks. The manager screen will currently allow you to browse the mods available on Steam Workshop, but we’re also working on supporting Mod.io, and Curse Forge. Installing a mod is a matter of just a couple of clicks. It will also inform you of any dependencies – if a mod requires another mod to be present to work properly, we will tell you exactly what you need to download. As for the mod creation pipeline, we have updated The Riftbreaker Workspace Editor to allow direct upload and authoring of mods, all in one place.
- Added support for AMD FidelityFX Super Resolution 2.1. The latest version of FSR allows you to enjoy high framerates at a greatly improved level of visual fidelity compared to FSR 1.0. The advanced algorithms used in this version of FSR greatly reduce the visual glitches and improve the sharpness of the image without that artificial ‘sharpen +100’ look.
- Added a Reflective floor version so that you can enjoy the glorious Screen Space Reflections in your base.
CHANGES
- We reduced the bloom effect occurring during the thunderstorm event. Light flashes should be much less severe now. Let us know what you think.
- Grenades have been added to the player loadout in the Prologue.
- Reworked and added many sounds for working buildings.
- Changed how ears are positioned in the 3D scene and smoothed out the 3D sound positioning parameters (surround sound channel mixing).
- Canoptrix Nest model has been entirely changed to fit the 21st century better.
- Shield Generator should now finally display its operating radius.
- Added magma powerplant research item unlock to magma survival. Players don’t have to research an ’empty’ node anymore.
- Changed spear damage collision timing. The spear should not deal damage when retracting.
- Building time for compressors and decompressors has been reduced.
- Solar damage after researching Environmental shielding – sun has been reduced from 0.2 to 0.
- Missing third base statistic added to Fusion Core’s and Magnetic Pistons’ upgrades.
- Tweaked the defensive drone lighting effects.
- FSR 1.0 has been replaced with the 2.1 version.
FIXES
- Long in-game dialogs should now scroll properly.
- Gamepad building tool shortcuts now work properly in build mode, which allows for double-binding some keys on the pad.
- Loading tips should now properly display button symbols.
- Pipes built in the older versions of the game should now properly connect to the new ones and vice versa.
- Fixed a crash that occurred when loading a save file made during the construction process of a building.
- Fixed a crash that occurred when entering the research screen with no Communications Hub present.
- Fixed a crash in the Crafting Screen caused by invalid inheritance in reflections.
- Added Acidic yeast phrase mentioned in the dialogues to the bestiary sample name.
- Added missing icons for Energy Storgae building levels and Ironium Factory building levels.
- Minor fixes to localization.
KNOWN ISSUE:
This version of the game suffers from a bug that causes the version number to be displayed wrong. It’s going to display the TC version number as usual, but the Package version as o. It will be fixed next build.
How to prepare your mods for the in-game manager (click ‘show details’):
Hello Riftbreaker Tinkerers!
The latest Riftbreaker update includes something we promised you quite some time ago – an integrated modding manager. Thanks to this new functionality, players will be able to browse your creations in-game and download them with just a couple of clicks. Here is a screenshot of what it looks like in the game:
But what good would it be if you didn’t have any way of getting your mods to show up in the manager? Well – you don’t have to worry about that at all. We have updated The Riftbreaker World Editor Suite with all the tools you need to share your mods with the world (plus a lot of new features and bug fixes)! This article will tell you how to prepare your mods to conquer the world step-by-step. Enjoy!

The first thing you need to get is the World Editor Suite. You can do so either by going to your Steam Library and downloading the package from there (you need to enable tools viewing first, see gif) or by going to our GitHub at https://github.com/exorstudios/riftbreaker-tools. If you are new to the Riftbreaker Modding scene, this article should cover the very basics: https://store.steampowered.com/news/app/780310/view/3109170041988719336. If you’ve got that covered, let’s move on to the next part – getting your mod to show up in the Manager.
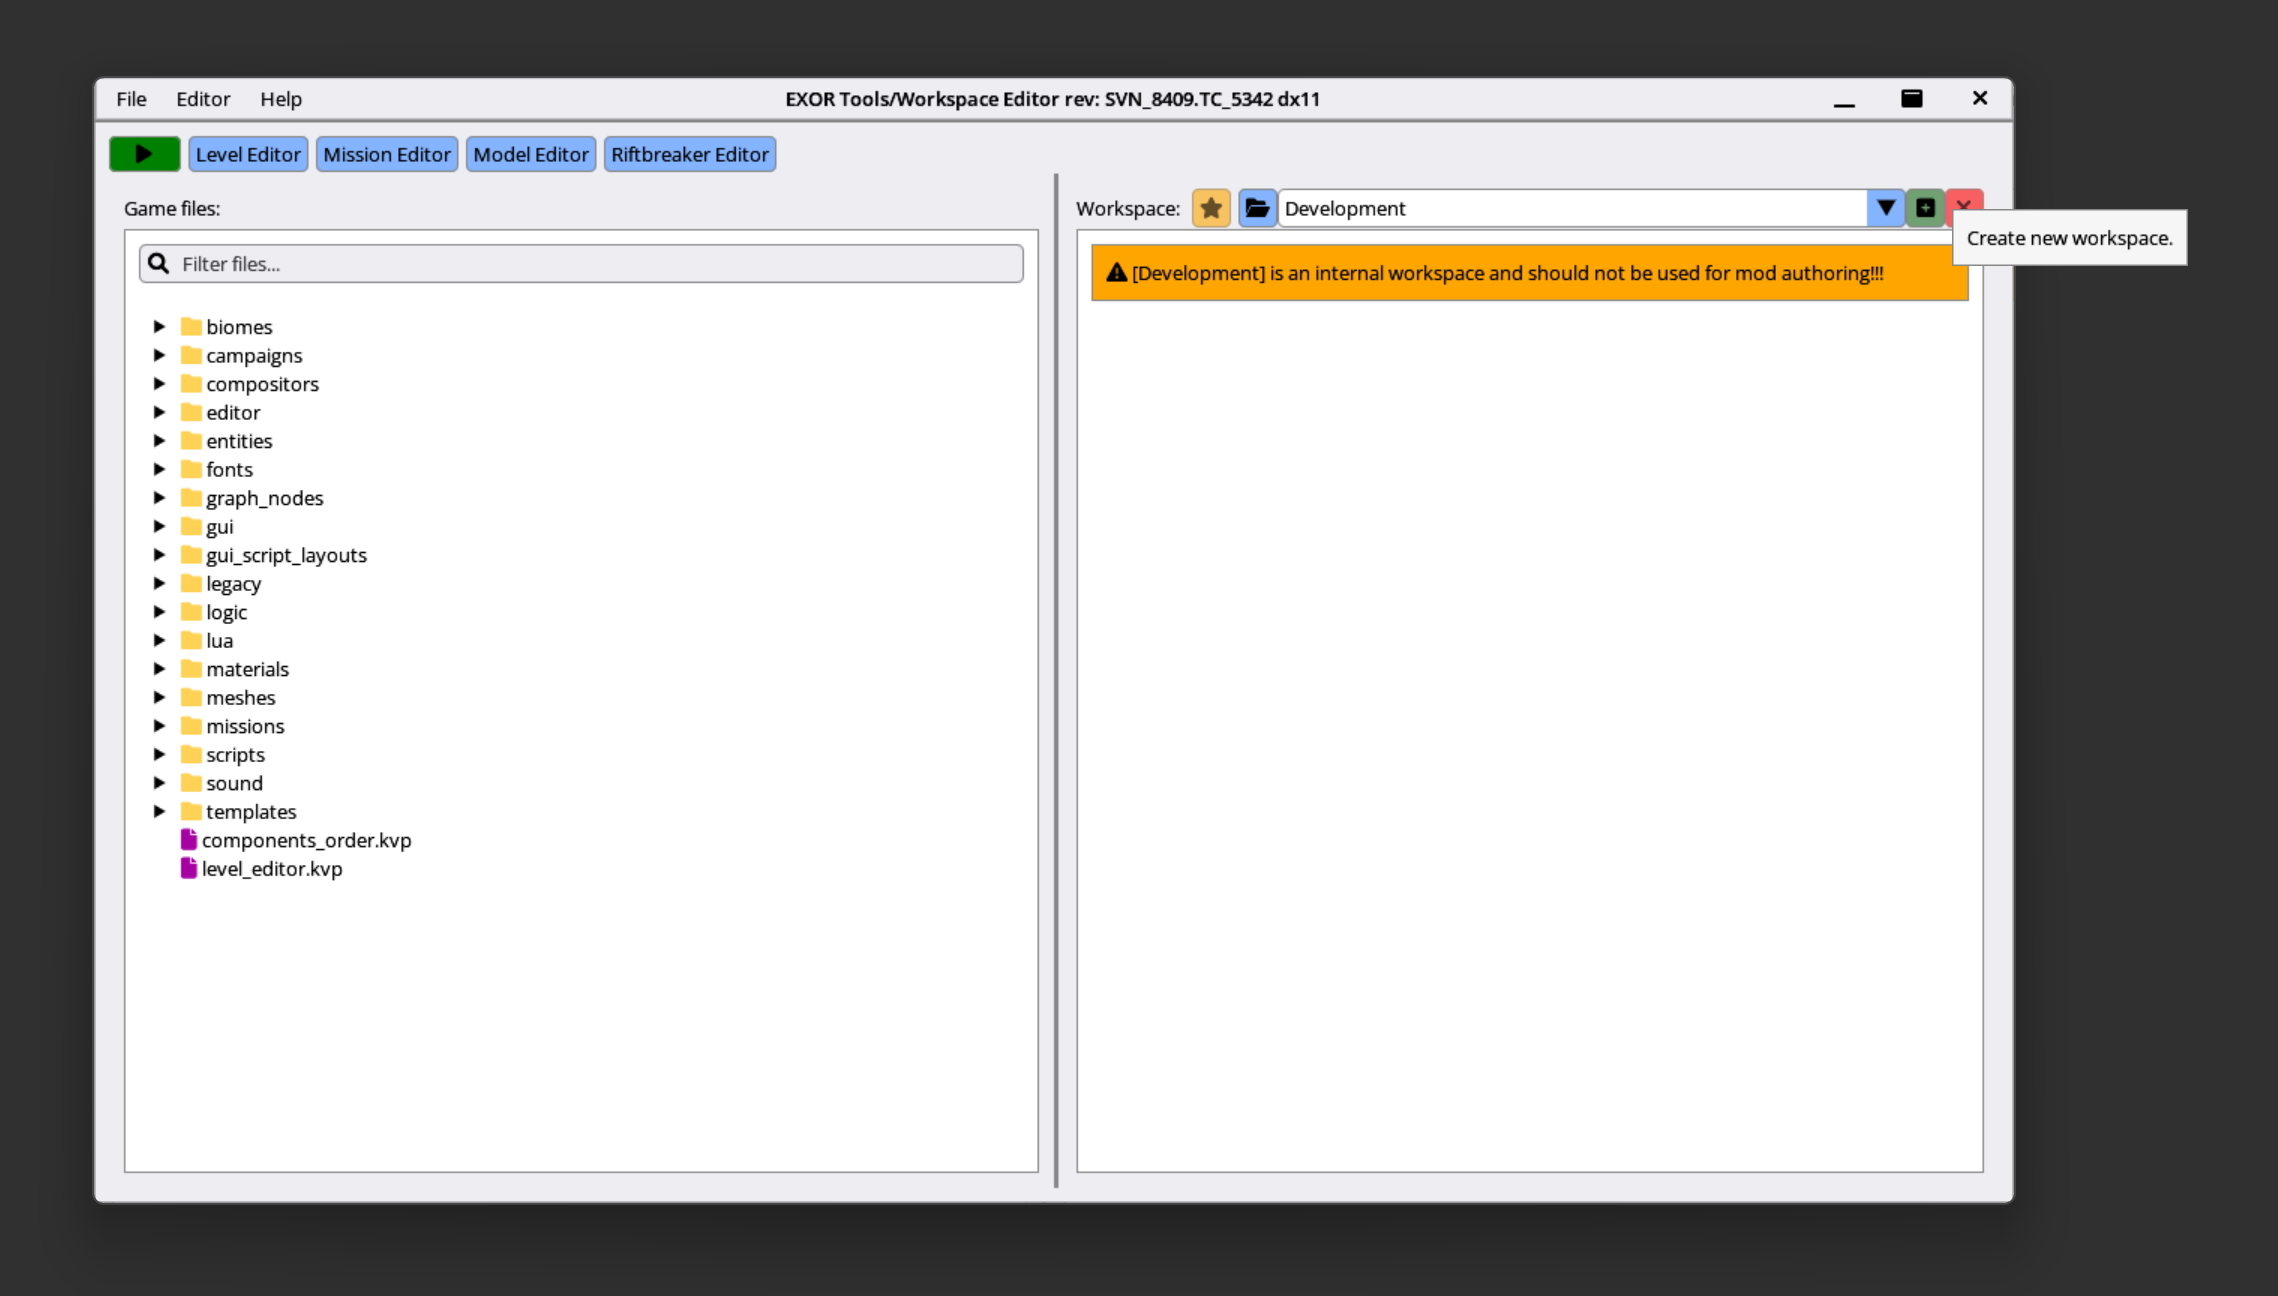
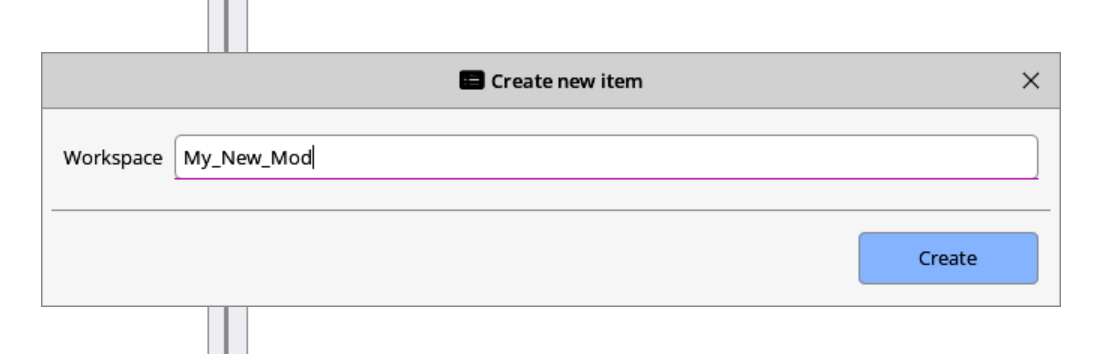
The first thing you need to do is open up the Workspace Editor and set up a new workspace.
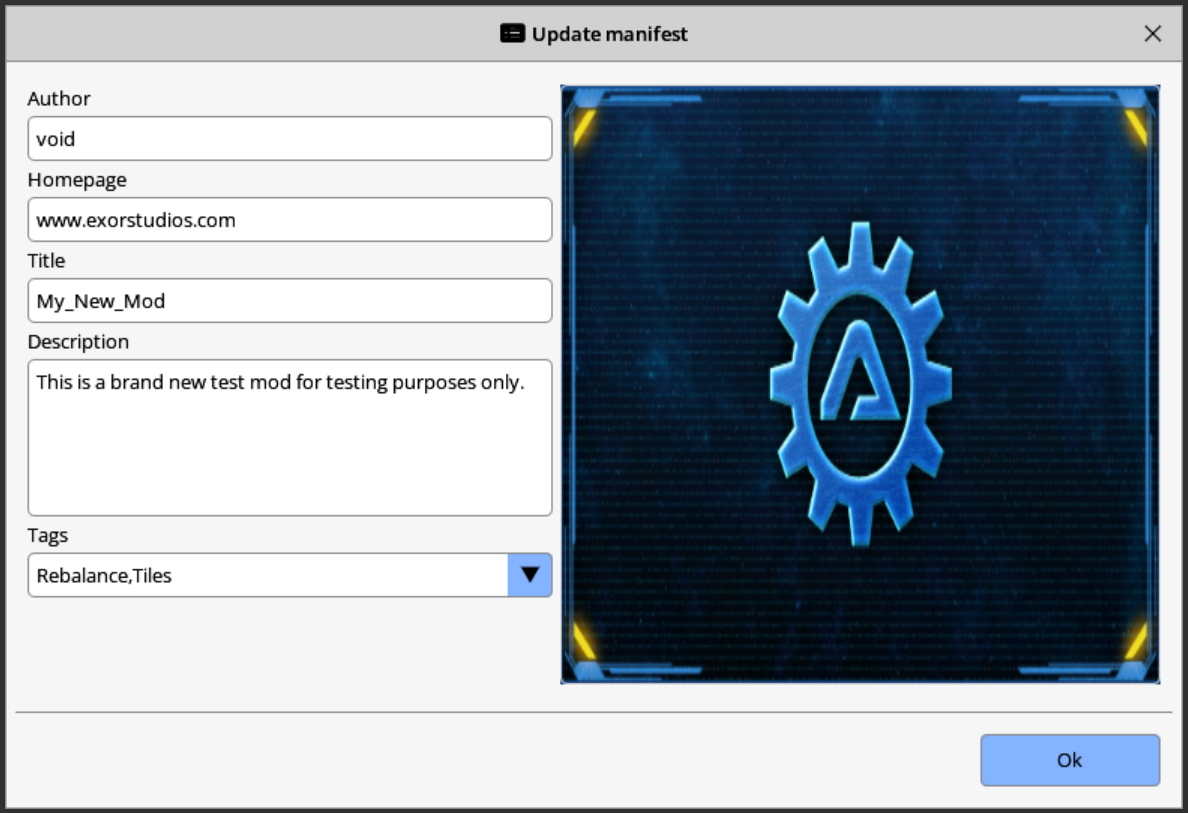
You can name it anything you like – this name is only for your internal use. Immediately after setting up the workspace, a brand-new window will pop up – Update Manifest. This is where you can fill in all the information about your mod: your author name (visible to others), your website if you have one, your mod’s name, its description, and tags. The tags are pre-configured by us and will be consistent across all mod hosting websites we aim to support (Steam Workshop for now, Mod.io, and Curse Forge to be added later). You can also set up a thumbnail for your mod by clicking the image on the right of the window. The preview image is a PNG with a minimum size of 512×288, a 16:9 aspect ratio, and up to 8MB.
If you’ve got an older mod you want to adapt to the new flow, you can also do so. Open your old Workspace and click Export – this option will display the Update Manifest window, where you can fill in all the info. You can also access the Update Manifest option at any time by choosing the option in the Workspace menu.
After that, it is business as usual. On the left side of the Workspace Editor window, you will see the internal file structure of The Riftbreaker. You can copy the files you want to edit to the right side (or just simple drag and drop a file from the left window to the right) – your little modding sandbox. Edit all the files you want, add new ones – go nuts! When you’re ready to release your mod to the public, it is time to make it public.

Click the green ‘Export Workspace’ button at the bottom of your workspace. The Editor will give you a chance to update your Manifest once more before you make the mod public. If you are happy with all the metadata, simply click ‘OK’. That will open a new window called ‘Export Workspace’. In that window, you can add more information about your mod. The first piece of info is the version number of your mod. The convention we’ve gone for is X.Y.Z, where X denotes the major release number, Y is the minor version, and Z is a patch. Try to stick to that, don’t go to version 6.6.6 on day one. The next important piece of info to fill out are the change notes.

After you’ve provided all the information, you’re good to go! Press publish, and your mod will make its way to the Steam Workshop! Whenever you would like to publish an update to your mod, simply click the Export Workspace button again, increment your version number, and fill in the patch notes.
